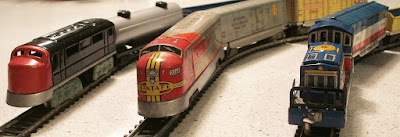
After affixing the track to the board, there was really only one thing left to do -- run some trains. The three Japanese-made trains I had for this setup ran the spectrum of operability.
 |
| From left to right: the Bandai, Cragstan, and Straco train sets. |
My childhood Cragstan engine would barely move. Early in its life, we had lost the powerpack (Mom wasn't one to keep our toys continually supplied with batteries), so the engine was mostly just pushed down the track when I played with it. When I put it on the layout, the locomotive whined a great deal, but hardly moved. I suspect internally there are either stripped or misaligned gears.
In the middle of the performance spectrum was the Bandai set. This locomotive had not been run for quite a while, and even with lubrication, it was somewhat balky in its motion. The longer I ran it, the smoother that motion became, but not by much. Here's its inaugural run on the layout. As you can see, it still has problems with the slight voltage drop on the straight section.
The best-running set was the Straco Express, the toy train I had bought on a whim -- and the one which started this entire project. As you can see, it ran very smoothly. I soon learned, though, not to let the train go too fast. It didn't take much for those featherweight cars to fly off the track!
Although this is the end of this project, it's not necessarily the end of the series. I'd like to find some Japanese tin cars and buildings to add to the layout -- things that are in keeping with the look and the era of the Straco Express.
Total cost for the project:
Pegboard: $4.95
Flathead Screws: $0.40
Moulding: $2.49
SilClear: borrowed from a friend
Paint: left over from another project
Wood Screws: $3.60
Felt Pads: $1.99
Power Pack: $5.90
Total Cost: $19.33
#Straco
No comments:
Post a Comment